Handling Your Self Drainage System Project
Handling Your Self Drainage System Project
Blog Article
This post below relating to Simple Steps for Installing a Shower Base is seriously stimulating. You should investigate for yourself.
Upgrading a washroom is one of the much more prominent home improvement jobs. Taking care of the plumbing for draining your shower can be exceedingly easy unless you go overboard.
Managing Your Own Shower Drainpipe Installment Task
Whether you are a tub or shower individual, most people look for shower just choices when getting a residence. This simple reality indicates greater than a couple of homeowners invest a weekend break upgrading or setting up showers in their restrooms. The good news is for you, it is a fairly simple process.
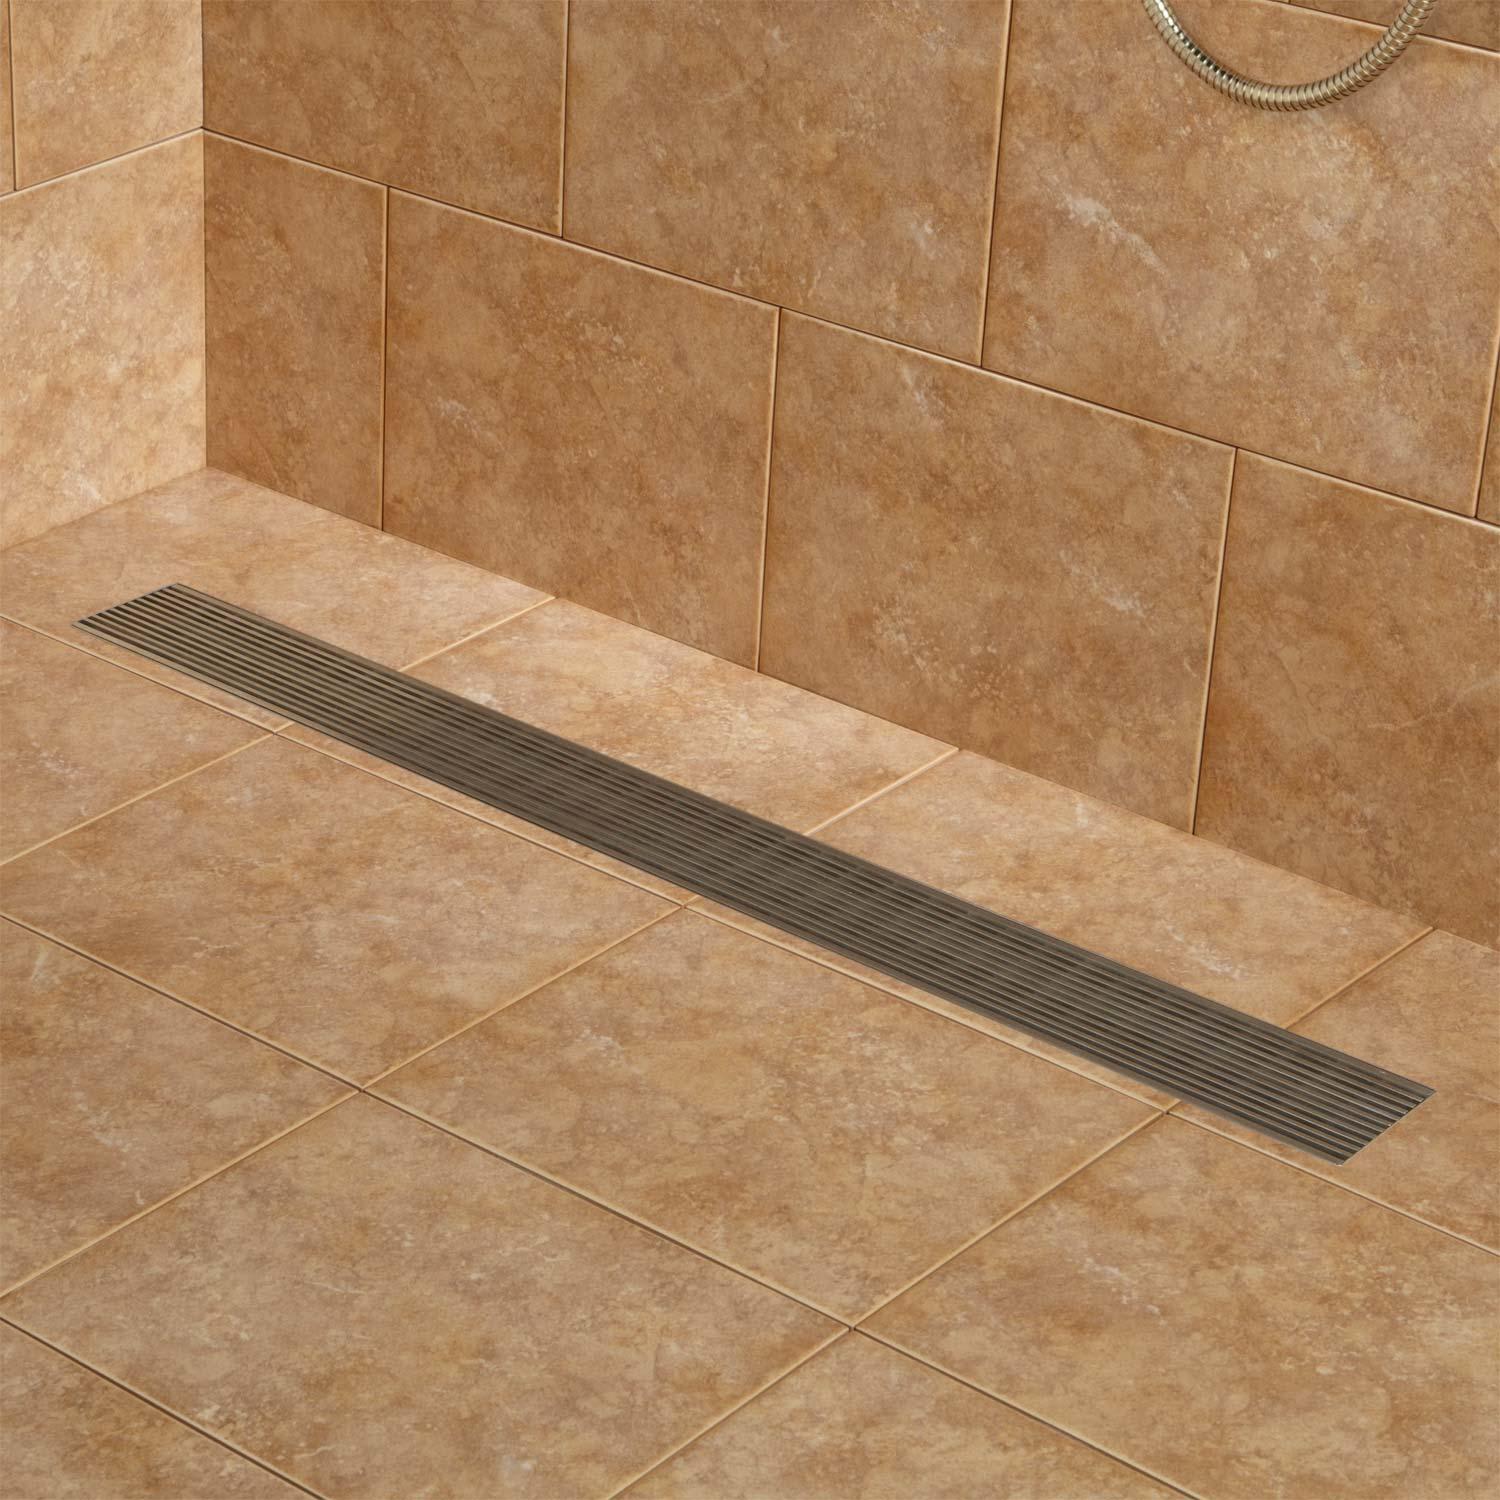
An enthusiast or pan refers to the straight surface area situated at the bottom of the shower. The collector typically consists of a non-slip surface area somewhat banked in the direction of the facility or any place the drainpipe is located. Integrated with 3 to 4 inch walls around the side, the goal of your shower drain plumbing is to obtain the water to move to as well as down the tubes.
You can literally construct a collector for your new shower, yet you actually need to think of it. Do you actually want to enter the complications of getting the sloping right, and also seeing to it every aspect of it is water resistant? And I mean every facet! It is much easier to just acquire a pre-cast collector online or at your local Lowes, Residence Depot or equipment store. Structure one may seem like a wonderful suggestion, however you will most likely feel in a different way after a couple of hours.
Regardless of how you deal with obtaining a frying pan, you must strive to use one that has the drain located in the same place as the initial frying pan. Relocating the drainpipe pipelines can be a task, particularly if the contractor used a distinct framing framework. If you are established to relocate the drainpipe, you are mosting likely to need to cut down the pipe or lengthen it, which may imply ripping up large pieces of the floor. Rephrase, you are going to be considering a several weekend break project.
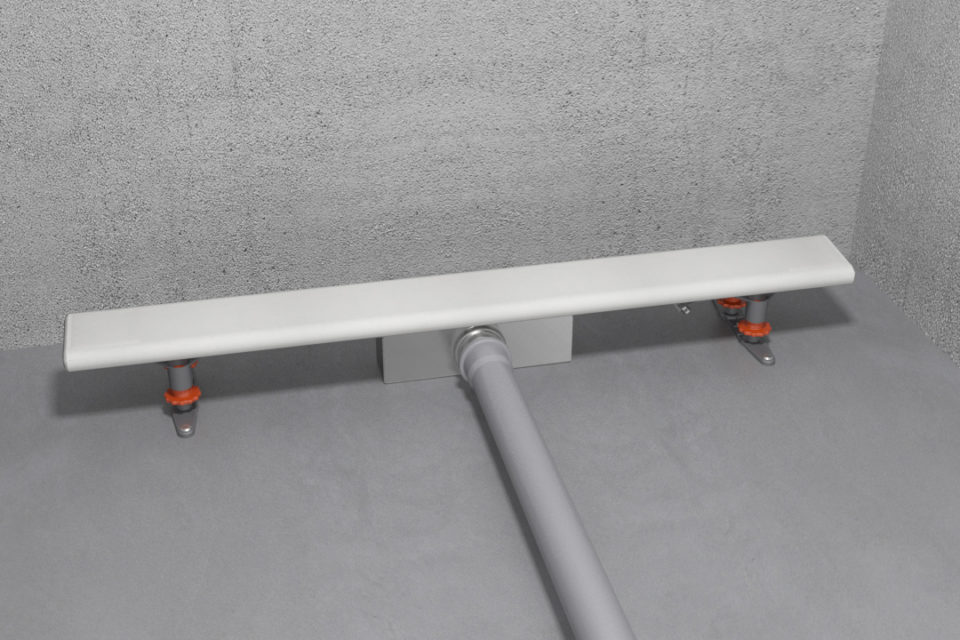
Presuming we have our drain aligned, the actual hook up is fairly easy. The drainage pipeline should be dealing with upright approximately the enthusiast. It will frequently look like a "U", which indicates it works as a cleanout to maintain unpleasant smells from returning up from the drainpipe. To connect the drain, you are going to produce a water tight connection in between a drainpipe cap on the top of the pan and the drainage pipe. Systems differ, yet you are commonly going to do this by putting a coupling piece on the top of the drainage pipeline. This is then covered with gaskets and essentially screwed right into the drainpipe cap. The drainpipe cap must serve as a locknut, to wit, it screws directly onto the coupling.
The difficult part of this process is obtaining your drain cap to suit a watertight setting in the pan. This is accomplished by withdrawing the drain cap when you make certain everything fits together. At that point, you put plumbing professionals putty around the bottom of the cap and afterwards screw it back on. The putty must form a tight seal in between the cap and the shower frying pan, which keeps water from dripping under it and also into the mounting under the shower.
Certainly, bathroom showers can be found in a wide range of designs nowadays. If you purchase a collector, they almost always featured plumbing instructions or the store can keep in mind anything unusual you ought to recognize. It appears complicated, yet is usually quite easy. Have fun!
How to DIY a Shower Drain Repair or Replacement
Verify the Source of the Leak
Pour some water down the drain using a funnel. If you don’t see signs of leakage from the drain, the leak may be coming from a worn bathtub seal. In this case, fill the bathtub with water and look for leakage between the bottom of the tub and the floor.
Determine What Drain You Need
There are two main types of drains. The options include those with a trip lever, including foot lock, roller ball, and lift and turn drains. Those with trip levers include pop-up and plunger drains. While each may have its own installation guidelines provided by the manufacturer, we’ll continue with the general process of replacing your shower drain.
Access the Drain
If there’s a cover over the drain flange, remove it. Old covers may be stuck in place, so you may need a hacksaw blade to cut it and pry it loose. But if there is no access panel, locate where the shower pipes are, place a cloth or metal plan below where you cut into the wall (to catch any water), and use a drywall saw to cut a panel on your own (you should wear safety glasses if proceeding with this step). You’ll want to cut a piece that can be put back in the same spot after the drain is replaced.
Ideally, you’ll have access to the drain parts through the shower wall. In some cases, the only option is to make an access point through a closet or bedroom.
Remove the Leaky Parts
With the drain exposed, you should see where it is leaking from. There is usually some discoloration in the area of the leak. The drain body, strainer body, or gasket can be removed with pliers while a screwdriver is needed to remove the strainer.
Repair or Replace the Drain
A shower drain repair kit can be purchased at a home improvement store. It will have instructions that will show you how to disassemble and repair the shower drain. Usually, it’s only necessary to fix the parts that are broken. You can combine old and new parts if they fit together. If the entire drain needs to be replaced, swap out all the old parts for the new ones so there are no more leaks.
Test the New/Repaired Drain
Turn on the water lightly while observing how it flows into the drain. Then check the pipes below the shower (in the basement or on a lower floor) to see if there’s any leakage. Once you verify any leak has been fixed, you can go ahead and patch up the wall (using drywall mud and a mud knife).
Ceilings that have water stains should be repaired. Cut away the affected section and replace with a piece of drywall and drywall mud. This eliminates damage caused by the leak and lets you find and mitigate other potential issues such as mold.
https://www.blackhillsinc.com/blog/how-to-diy-shower-drain-repair-replacement/
We had been guided to that article on How to Choose the Best Drain for Your Shower through an associate on another web page. Those who enjoyed our article please be sure to share it. Thank you so much for your time invested reading it.
Report this page